In the WAX Cloud wallet, your account names will be 4-5 characters followed by .wam.
The cloud wallet is a centralized wallet, it's great to use to get familiar with WAX, the NFT markets and games. However if you start to accumulate some value in your account, you are most likely wise to get a self-managed account for added security and less risk.
This is standard practice when it comes to cryptocurrency, at some point you will need to look over your account security, but it's not needed at start. Specially if you just wanna explore, dabble and have fun with the WAX blockchain. For most people, the cloud wallet is all they will need to interact with the WAX blockchain, and they will never need a self-managed account.
Now, let's dig into the process, it's rather straight forward, but let me walk you through it.
How to create your WAX cloud wallet account
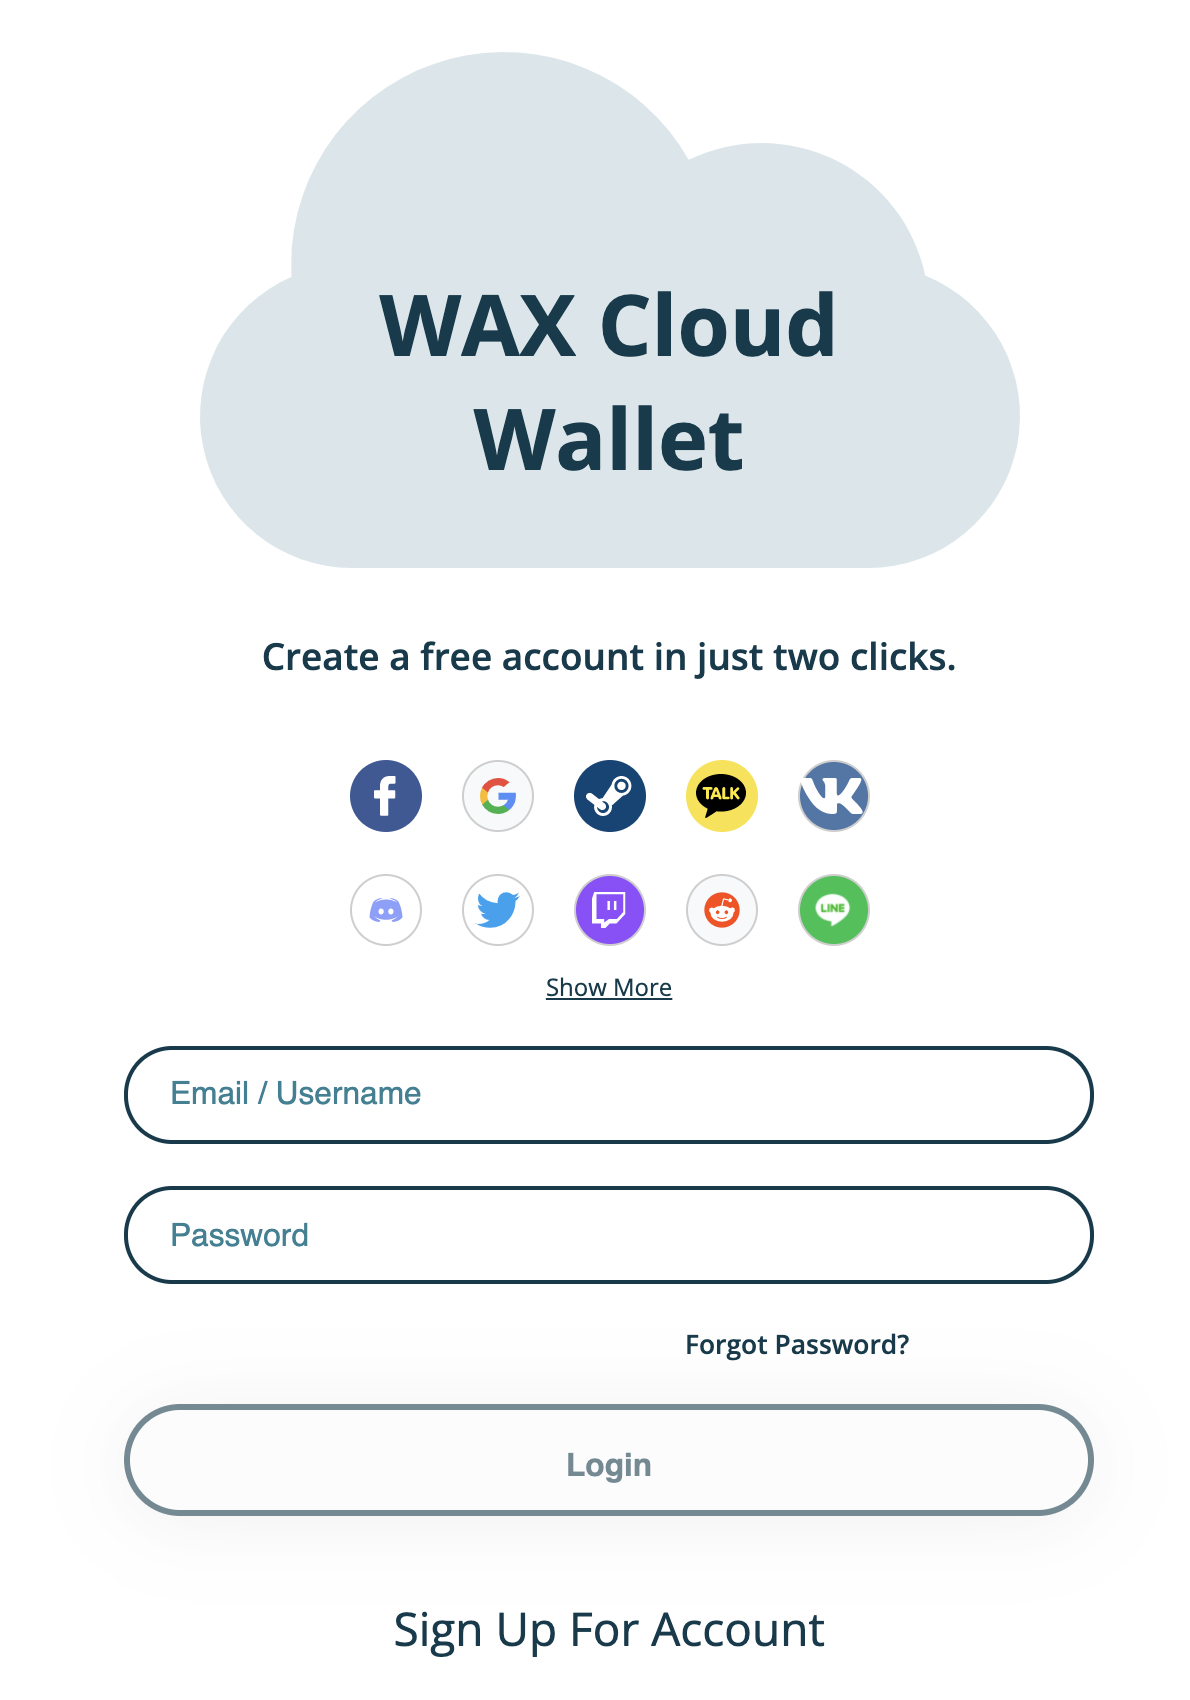
1) To create a new WAX Cloud Wallet navigate to https://wallet.wax.io/ & choose a login method using either the provided social logins or with a email/username and password

Once you have created your WAX cloud wallet you'll want to familiarize yourself with the rest that it has to offer. Lets take a look.

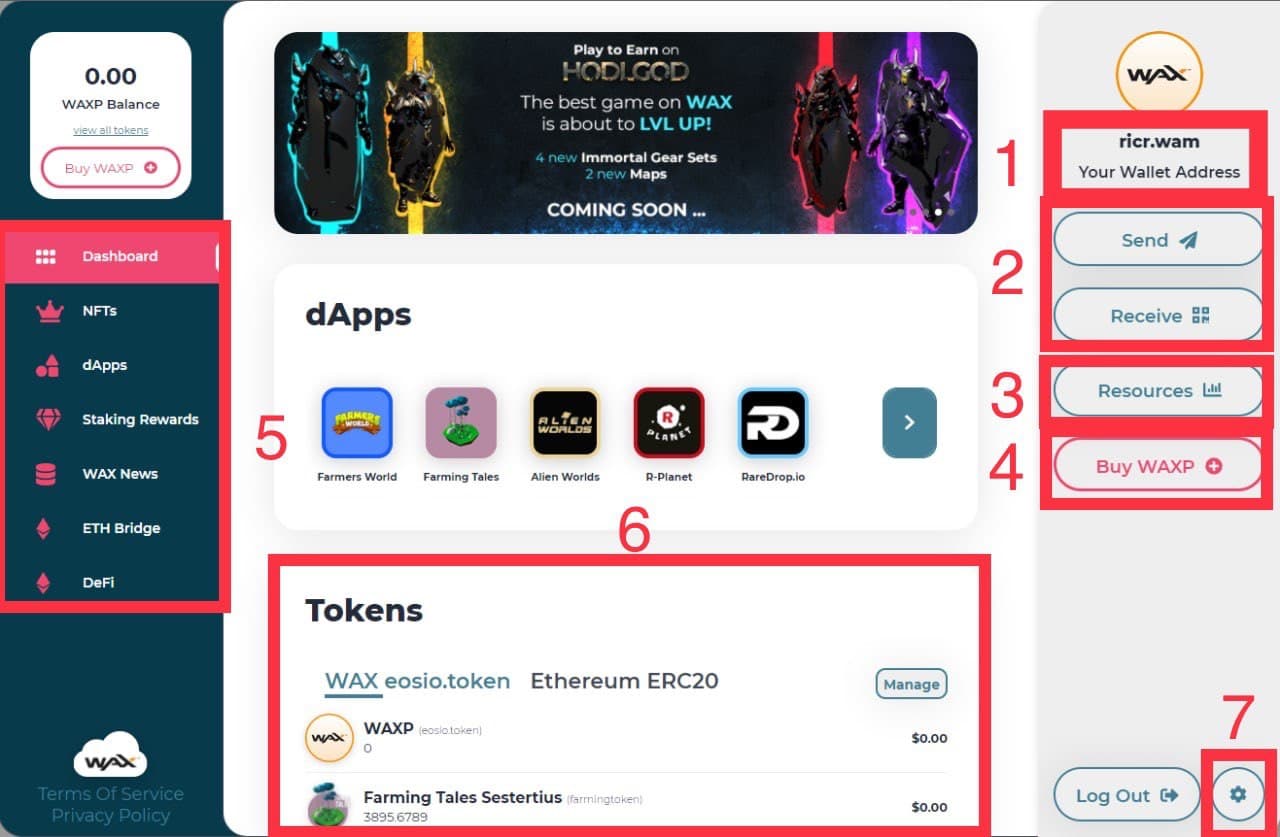
1) Wallet Name
This is your default .wam address, this is your account name on the WAX Blockchain. With it you can do things like receiving NFTs, tokens, or enter giveaways. This can also be customized to your liking, but only buy creating a self managed account that use another wallet. More on that in next chapter.
2) Send & Receive tokens on the WAX Blockchain
Unlike other blockchains the WAX cloud wallet makes sending & receiving WAXP really easy and can be done by simply entering the recipients .wam address & amount to send or find a QR code that can be shared with others.
3) Network Resources
It's important to also learn the in's & out's of WAX's gas equivalents. Here you'll be able to stock up on CPU, NET, & RAM. Resources are needed for common things like transactions on the blockchain or capacity for your wax holdings & storing data. To learn more about resources visit this link here, (link)
4) Buy WAXP through Third party services directly in the wallet.
Buying WAXP is also very easy to get a hold of via this tab where you'll find a list of places where the token is offered. This list can also be viewed here, (link)
5) The Navigation Menu
Here you can navigate seamlessly between things like your NFT inventory for easy viewing, a place to stake your WAX for daily rewards, news, ETH bridge, & DeFi. Here's a few that we would like to highlight:
Staking rewards- Stake your WAXP tokens to to vote on important decisions like block producer selections. Voting on a regular basis will net you daily WAX rewards and maintain a strong voting strength. More on staking & rewards here.
ETH bridge- Allows for the transfer of crypto assets between the two blockchains including ERC20 tokens such as ETH, BUSD, USDT, and DAI. Also enables WAXP Token holders to convert their tokens into WAXE. WAXE is an Ethereum ERC20 token, and can be deposited into the WAXE-ETH Liquidity Pool
DeFi- Convert your WAXP to WAXE & stake your WAXE-ETH pair before the start of each epoch to earn the governance WAXG token & Ethereum. Refer to this video for an easy follow along here
6) List of Tokens on WAX
Inside the WAX ecosystem you’ll find that many times different projects offer their own token that are used within each project. These tokens are important to keep track of and can be viewed here. In the image above you can see this account holds Farming Tale's Sestertius token.
7) Settings
Inside the settings tab you'll have the ability to edit your basic info & enable 2FA authentication for added security. You'll also come here for creating a new wax account for use with self-managed wallets
The Cloud Wallet
The WAX cloud wallet is super easy to use with DAPPs and NFT marketplaces. All you will need to do is allow popup from the website or marketplace and hit that login button.
The Cloud wallet is what majority of WAX users uses to interact with the blockchain, mainly because it is highly convenient and easy to use, easy to maintain and can be used on Computer, Mobile and Tablet.
In the next chapter we will look at how you can set up a self managed account, they allow you to choose your account name, but leave all responsibility with securing and managing your account in your hands. You also have the option to use hardware wallets if you want.
