What is a self managed wallet?
Self managed wallet means you are responsible for your own security. I will not go to deep into the details of how private keys and public keys work in this Introduction of WAX course, but if you are interested you can start by reading this article. https://waxsweden.org/private-key-management-for-dummies/
The biggest advantage of using a self managed account over the cloud wallet is that you have full control over your WAX and NFTs. You also get a few advanced options such as custom permissions, multiple keys to secure the account, ability to set up account recovery and a few more advanced alternatives.
The biggest risk with having a self managed account is user error. If you have not set up your account properly, and done your backups and risk management properly, you risk loosing everything and no one can protect you. If your harddrive crash, if you get scammed, if you get hacked, if you get injured and forget your password, well, you are rekt. There are many ways to manage these risks, but it is on you to set that up. At a minimum, create multiple backups of your private key(s).
The most common reason for anyone to create a self managed account is that they can choose the name of their account. On WAX you can create any account name that is 12 character long consisting of 'a-z' and '1-5'. You also have an account bidding feature to get a premium account name that is shorter than 12 characters, more on that in a future course.
How to create my self managed account?
The easiest way is to use your free to set up cloud wallet to create your self managed account. This can be done from within the wallet interface. Before that is done, you will need to have a place to generate yourself a key-pair to use. This can be done inside most wallets. In the guide below I will use the Anchor Desktop wallet. You also have the option to use a hardware wallet such as ledger and/or trezor for your private keys. More on that in the next chapter 'Hardware wallets (Advanced)'.
Download anchor: https://github.com/greymass/anchor/releases
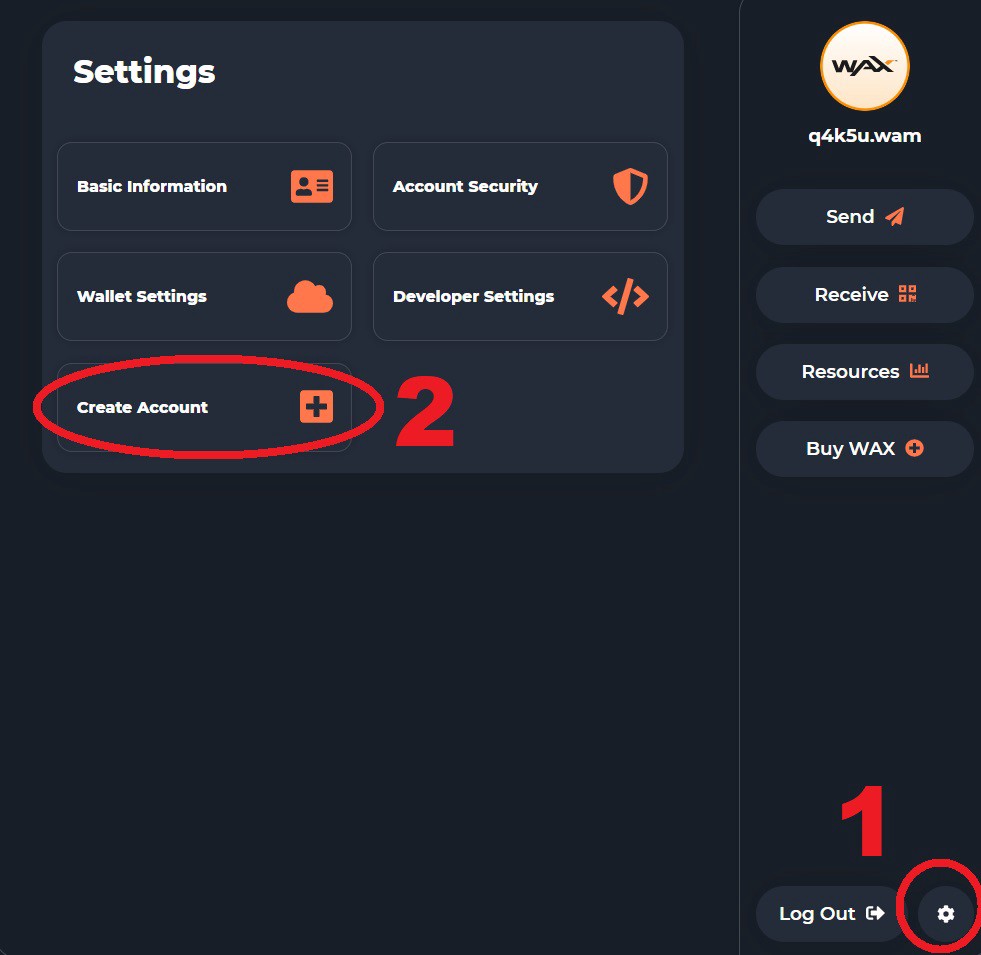
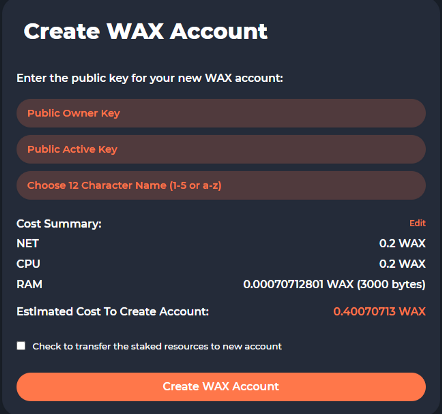
Then you need to enter your public keys, and the account name you want. You also want to make sure you stake enough resources for your account, a few WAX for CPU and a few for NET is enough to get started. If you plan to have a lot of NFTs, I would increase the RAM a bit as well. This can all be done later if you want. If you plan to use the self-managed account for trading NFTs or playing games, you will need a bigger stake in CPU. These can later be unstaked to get your tokens back, which takes 72h.
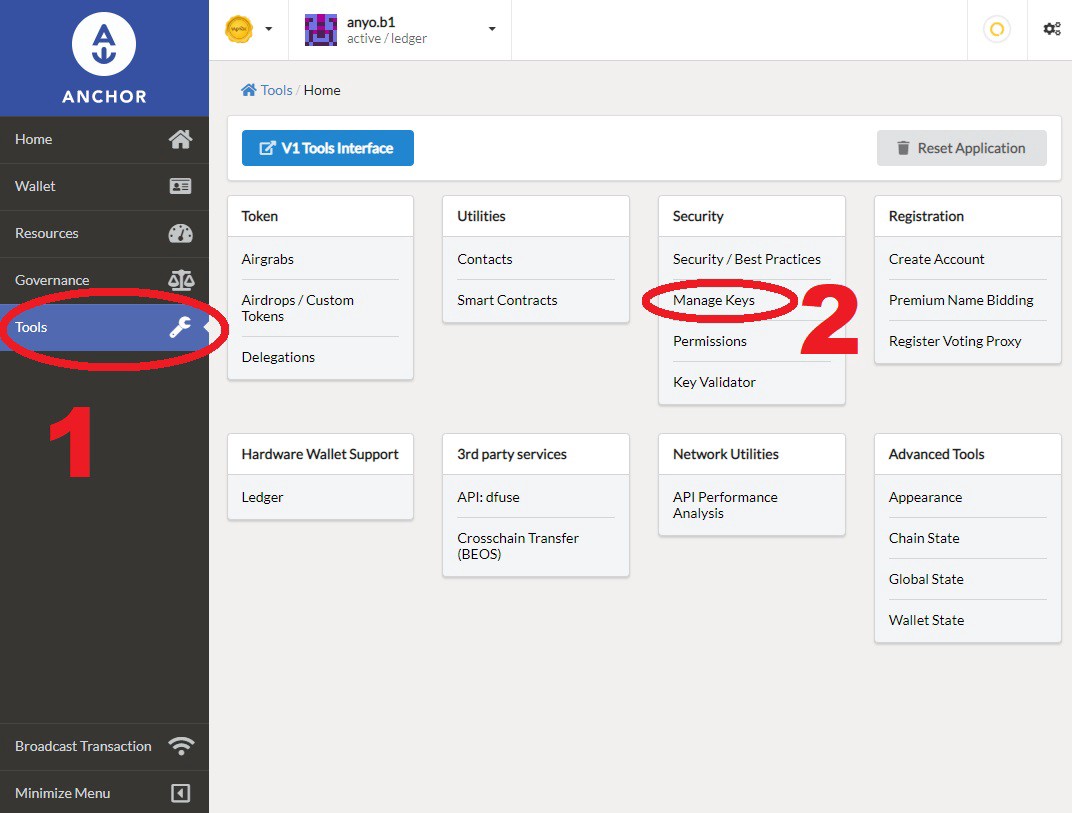
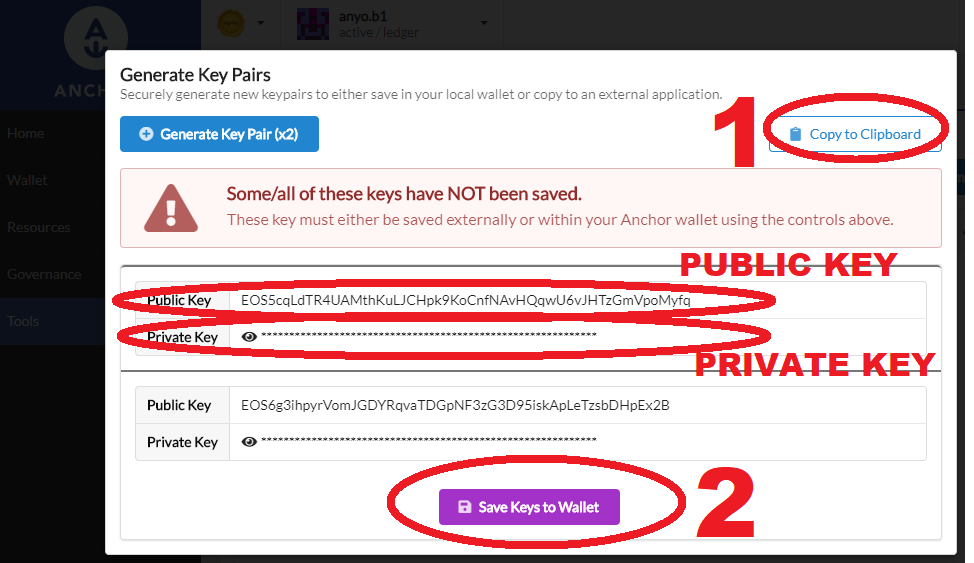
If you do not have a public/private key pair before, you can generate one inside the anchor wallet (Download link).
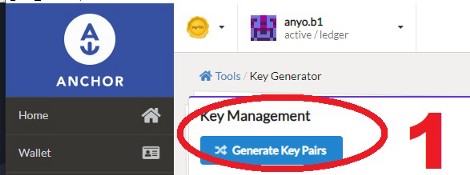
When you generate your key, make sure you copy it into a secure location. This can be an encrypted file or on a USB stick that only you know the location for.
You also have the below video walk through of how to set up anchor if you want.
Summary
A Self managed account is a secure and great way to store your crypto and NFTs. You remove the risk of using a cloud service, but add risk of managing your own keys.
A self managed account is only as secure as your setup, if you are sloppy and don't backup your stuff properly, you risk of losing complete access to your crypto.
There are a bunch of ways you can minimize this risk, and other risks. One is to use a hardware wallet. But at least, you need to have secure backups of your keys in case your computer is stolen or crashes.
Harddrive failiure is not uncommon. If you only store your backup on one spot, and that disappears, you will lose access to all your stuff. So please, back it up before it's to late.
More on that in the resources below.
