One good practice is to do all this on the WAX testnet before you do it on WAX Mainnet. This is because you are able to find errors and test without risking that your immutable data fields are wrong. There are faucets to create accounts, get tokens, and use atomichub directly on the testnet. The only thing we don't have is the support of the cloud wallet on testnet. Which means you will need a wallet called "anchor" to make it work. More of this will be explained in the "wax testnet" part of this course. You can also find some useful links in the resources of this lesson
Best practice of NFT creation
The graphics you use in your NFTs are most often uploaded on IPFS, which is a decentralized storage system that allow hashing images, videos, files etc. This is a super neat feature that you can dig into if you wanna learn more. But in short, what it does is allow your data to be hosted in the cloud and live on later. Worth knowing is that your NFT graphics should be pinned into IPFS. This is a service that you can do on your own machine, or you use one of the available tools for it. on https://www.pinata.cloud/ you can get started for free, once you reach over 1GB of storage you will have to start paying for the service.
- Upload your graphics to pinata or similar service
- Make sure they are pinned
- The hash you get, is what you can add directly to the NFT image field.
Video showcasing how to use pinata for your NFTS
First, Create your collection

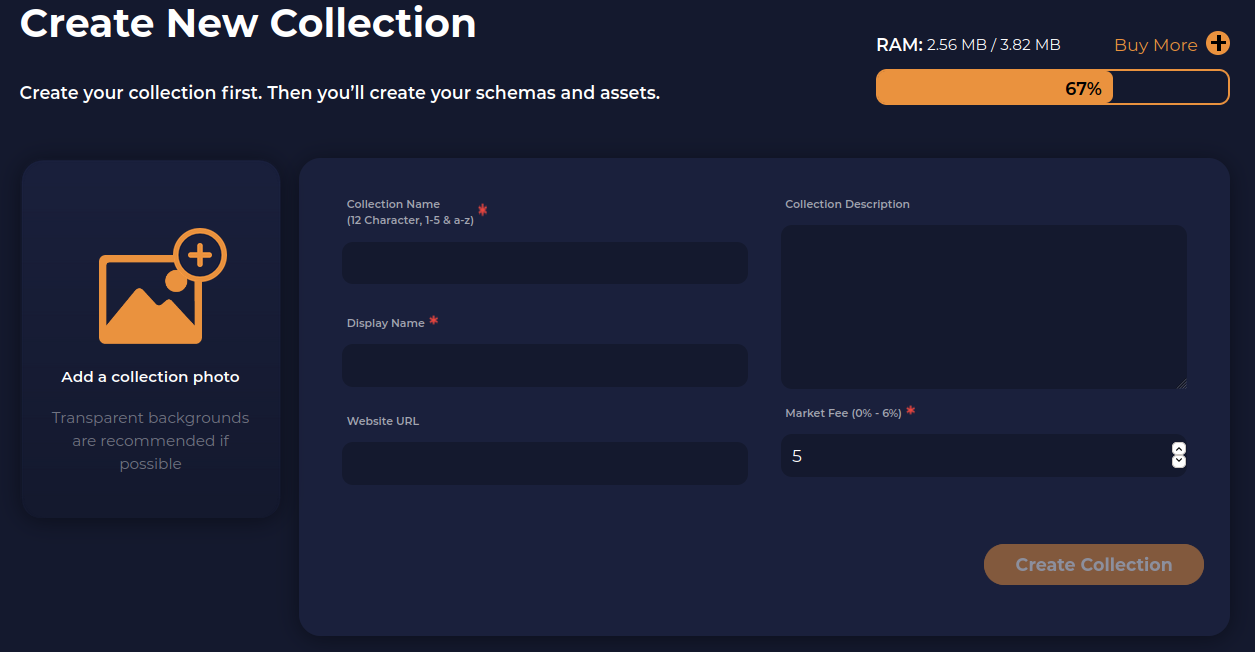
- Choose your collection name
- Creating your collection is pretty straight forward. Select your collection name, this is limited at 12 characters (a-z, 1-5) or, if you have a premium account you can set the collection name to your premium account name.
- Has to be lower case
- Choose the Diplay name of your collection
- This can be the full name of your collection
- This can be the full name of your collection
- Add a collection photo
- This is mutable, and can be changed later
- It also accepts gifs
- This is mutable, and can be changed later
- Add a URL to display as your website
- This is mutable, and can be changed later
- This is mutable, and can be changed later
- Add a collection Description
- This is mutable, and can be changed later
- It accepts Markdown text formatting
- This is mutable, and can be changed later
- Set a Market Fee
- This is how much you will receive of secondary market sales in the future.
- Common number is between 1-8%
- This is mutable, and can be changed later
- This is how much you will receive of secondary market sales in the future.
Second, create schema(s)

- Set your schema name
- This is immutable, can not be changed or removed later
- This is immutable, can not be changed or removed later
- Choose which attributes to include in your schema
- What you add are immutable, you can not change later
- You can add more immutable data to your schema later.
- What you add are immutable, you can not change later
- There are a few attribute names that automagically gets added as filter on marketplaces. A short list of examples are in previous lesson. e.g. video, rarity, backimg, artist etc.
Third, create your Template(s)

- Enter the name of your NFT represented by this template
- Either upload the image in the field up left, or add an IPFS hash in the image field
- Fill out the other attribute fields you entered in your NFT schema
- Choose if the template is to be "transferrable" and if it can be "burnt".
- The default is ofc to allow both of these. But for some use cases, it make sense to not allow this.
- The default is ofc to allow both of these. But for some use cases, it make sense to not allow this.
- Set a Max supply, if you want.
- This prevents you from ever creating more than set supply
- It also allows users to trust that the template will not reach a bigger supply than stated here.
- This prevents you from ever creating more than set supply
- Click that "create Template" and sign the transaction!
Forth, Mint your asset(s)

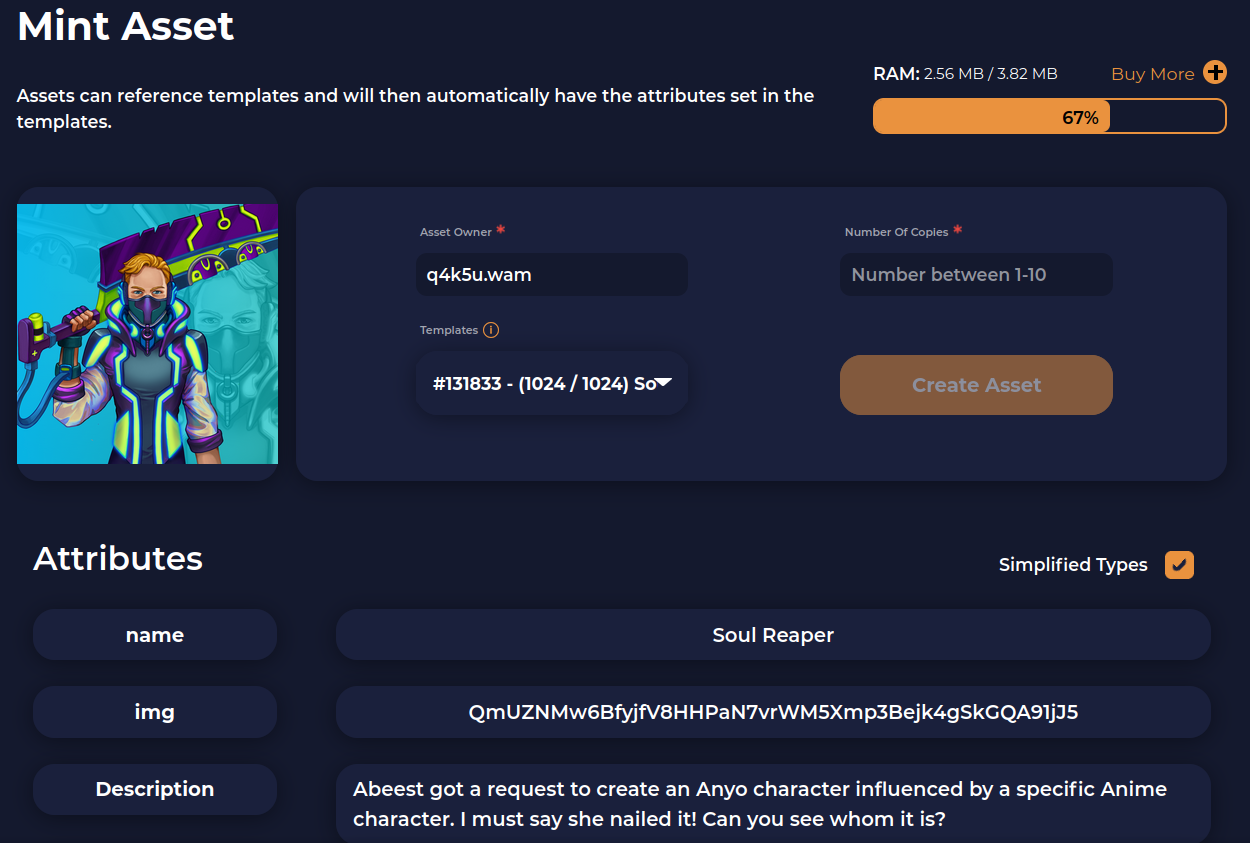
- Move into collection > schema > Mint asset
- Enter the account that will receive the NFT in the "Asset Owner" field
- Pick the Template to use from the list of "Templates" you created
- Choose how many copies of that NFT you intend to mint to that account
- Sign the transaction with the "Create Asset" button
This video showcase how to create your collection and NFTs on atomichub. Process is same for WAX as it is on EOS.
Summary
Sweet! You have now learnt how to create a collection and minted your first NFTs on WAX!
Now if you want, you can list them directly on the market, or give them away to someone!
If you want, you can also create multiple templates and then go and create a mint on demand drop, meaning you give people a link to a sales page (drop page) and they can choose to buy your NFT and as they do, they get minted to their account.
This way, you can set a price, supply, and only bought NFTs will be created.
